Page 4 of 6

Re: replacing/fixing door strut fixing brackets.

PostPosted: Mon Oct 14, 2013 8:53 pm
by Darren C
Aston Oil Pipes.

Whilst restoring my Aston I wanted to replace the oil coolers and rusty old Oil pipes.

Image

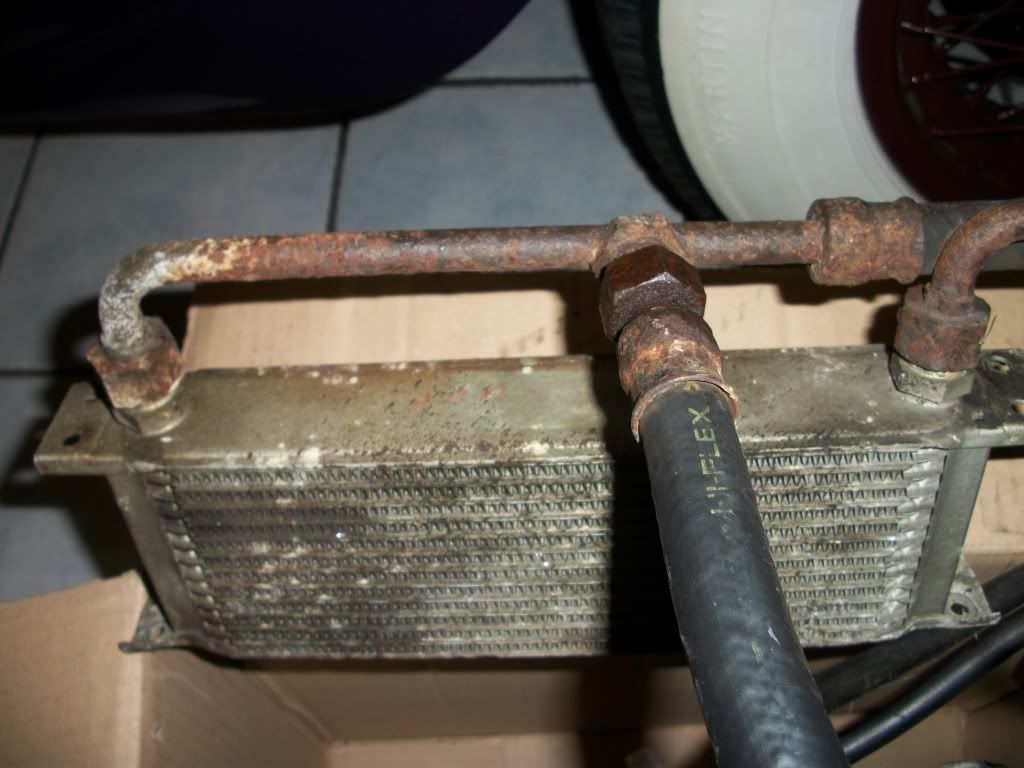
These hoses are mild steel and rust badly as they are behind the front bumper so take all the road spray. Aston wanted over £300 each for new ones and there are 6 in total!
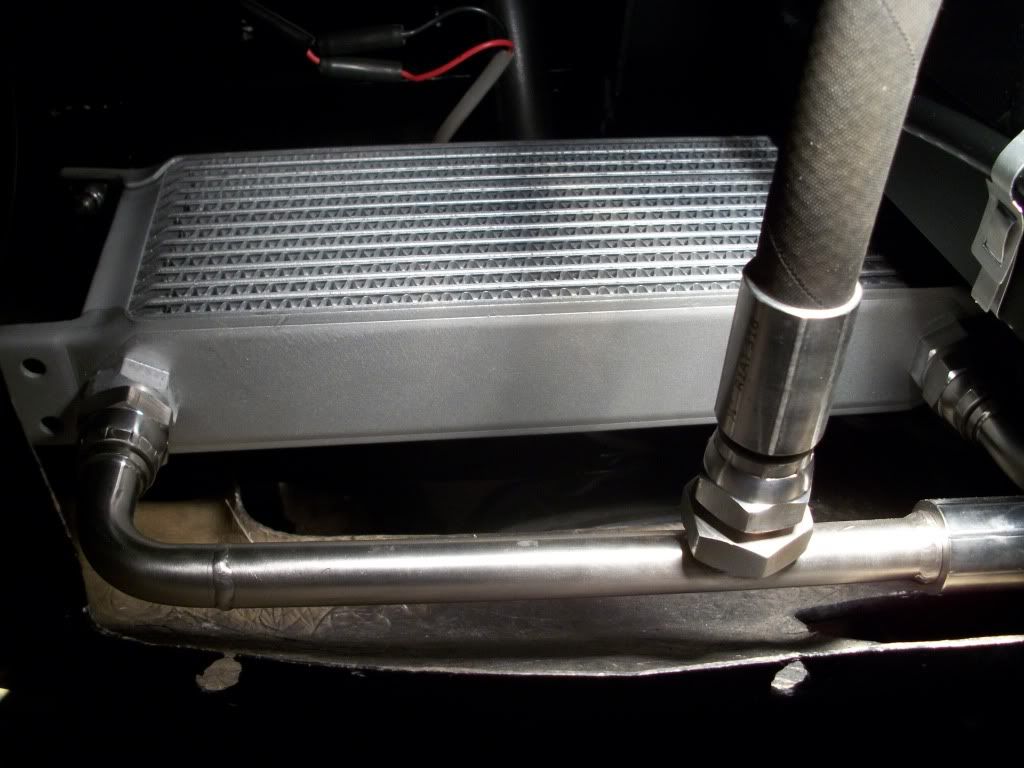
The new ones would rust too eventually so I simply got some 16mm stainless tube and bar, then machined all new fittings to make up the hose ends and unions. As the car is going to be concours I copied the originals mm for mm, as they are quite unusual in their design. Then I Tig welded it all together, and cap the ends to pressure test for leaks. Finally I took all the new pieces I made down to the Hose Doctor who kindly crimped on new hydraulic rubber hoses with Stainless 316 ferrules. This is what they look like on the car.

Image

Re: replacing/fixing door strut fixing brackets.

PostPosted: Mon Oct 14, 2013 8:54 pm
by Darren C
Aston Mesh Guards

Under each front Aston wheel arch there are two aluminium mesh Guards that cover the exhaust manifolds. The aluminium turns to dust as it rots with age. These are no longer available as spares from Aston so I decided to make some nice new Stainless ones.

Image

As you can see the old mesh is worn through where it rubbed on the manifold.
First I searched for the exact mesh profile, shape of hole and size of hole to the original in Stainless. Then I cut out strips of stainless sheet and folded them into U shapes for the frame.

Image

Next I needed to replicate the dome pressings in the mesh.

Image

So I covered the mesh with cling film and poured concrete over it to cast a block with a dish that I could beat the new mesh into with a wooden mallet. The two sides are different but the end results were good.

Image

Now the next hardest bit was the two semi circular frame sections. This inverted U channel bent in a radius is a difficult shape to create. If you bend a U section it simply deforms flat or closes up. Its hard to keep the U section profile as the inner needs to shrink the metal and the outer needs to stretch. Having thought long and hard about this I designed and made a rolling tool to form the U into the correct radius. This was made up from some scrap pipe fittings and bar, plus special secret D.C.Shed Industries profile rollers I made on my lathe.

Image
This made the perfect semi circular frame pieces.

Image

Image

Next I MICROWELDED the frame on to the mesh.

Image

That’s 0.5mm weld width with perfect weld run form NASA style in my shed!

All that was left was to fit them to the Aston

Image

Re: replacing/fixing door strut fixing brackets.

PostPosted: Mon Oct 14, 2013 8:55 pm
by Darren C
Ferrari Door Handles

A few months ago I posted a picture of my restoration work in Stainless on the broken Vintage Ferrari door handles, I finished them last week. So here’s what I did.
The handles were rusty and the operating paddles were missing on one and hanging on by one bent leg on the other.

Image

Image

First I roughed out new operating paddles with a hacksaw and file from some stainless bar.

Image

Then finished them off to the exact size with more filing and drilling

Image

The hinge rods were rusty so I made some new stainless ones on my lathe and cut in the spring clip grooves

Image

Image

With the parts stripped of old chrome and the pitting wet and dried out (they were Mazak (pot or monkey metal, horrible stuff that they make dinky cars from) they went off for re-chroming.
Once back, all threads and holes had to be cleaned up.

Image

The finished handles after re assembly

Image

Re: replacing/fixing door strut fixing brackets.

PostPosted: Mon Oct 14, 2013 8:57 pm
by Darren C
So get down that shed and start using those tools you lot! ;)

Re: replacing/fixing door strut fixing brackets.

PostPosted: Mon Oct 14, 2013 9:03 pm
by RobvdVeer
I wish i could do stuff like that..

Re: replacing/fixing door strut fixing brackets.

PostPosted: Mon Oct 14, 2013 9:51 pm
by Admin-bloke
Ok DC Shed Industries..... my efforts aka Admin-Electrical :shock:

My rear window wiper stopped working on my 8 year old daily driver Vauxhall Astra...

I grabbed the multimeter from the boot of the car (, well, it IS a shed ;) ) and found an issue with the wiring where it flexes at the hatchback pivot.

A few crimps here and there resulted in a now working rear wiper :D

Ps No scotchlocks were used in the repair of this wiring..

Re: replacing/fixing door strut fixing brackets.

PostPosted: Mon Oct 14, 2013 9:57 pm
by Admin-bloke
No comparison, excellent engineering as we have come to expect from DC Shed Industries

Re: replacing/fixing door strut fixing brackets.

PostPosted: Mon Oct 14, 2013 9:58 pm
by RobvdVeer
Crimps on the bendy point? This calls for the following line: "nothing is as permanent as a temporary solution" 8)

Re: replacing/fixing door strut fixing brackets.

PostPosted: Mon Oct 14, 2013 10:08 pm
by Admin-bloke
RobvdVeer wrote:Crimps on the bendy point? This calls for the following line: "nothing is as permanent as a temporary solution" 8)


This IS a permanent temporary fix :lol:

Re: replacing/fixing door strut fixing brackets.

PostPosted: Mon Oct 14, 2013 10:12 pm
by RobvdVeer
Everything in life is temporary. Only death is permanent (and grease stains).