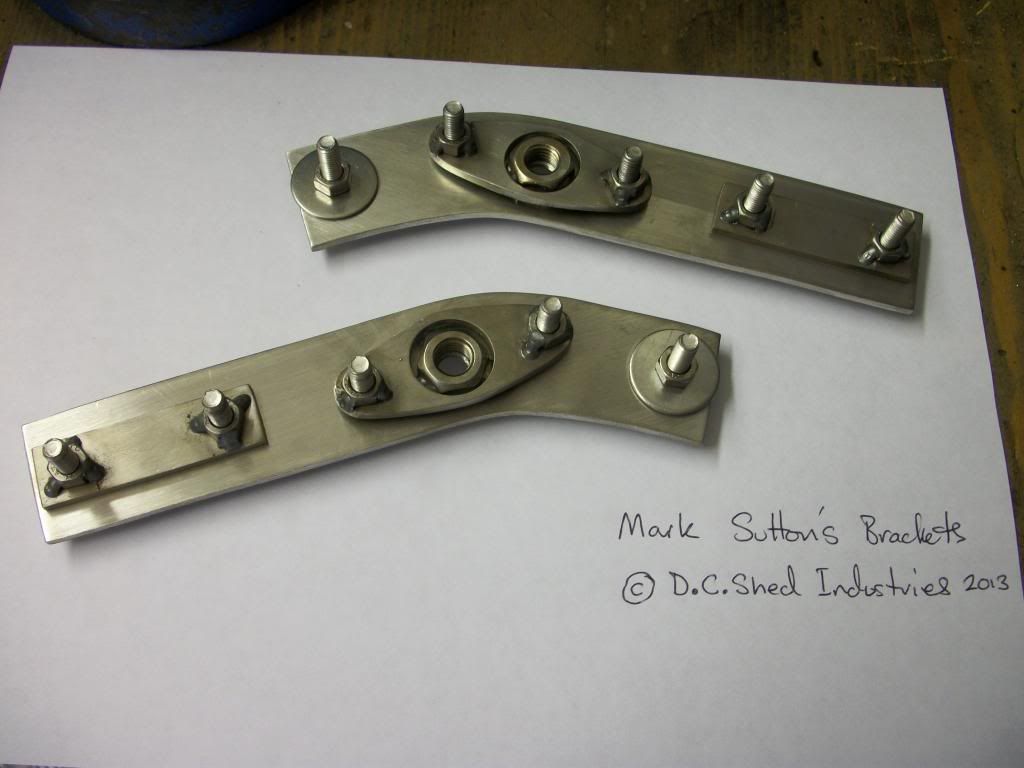
replacing/fixing door strut fixing brackets.

Welcome to the DeLorean Club Forum, this area is for general DeLorean chat

Re: replacing/fixing door strut fixing brackets.

Postby Darren C » Sun Oct 13, 2013 12:25 pm

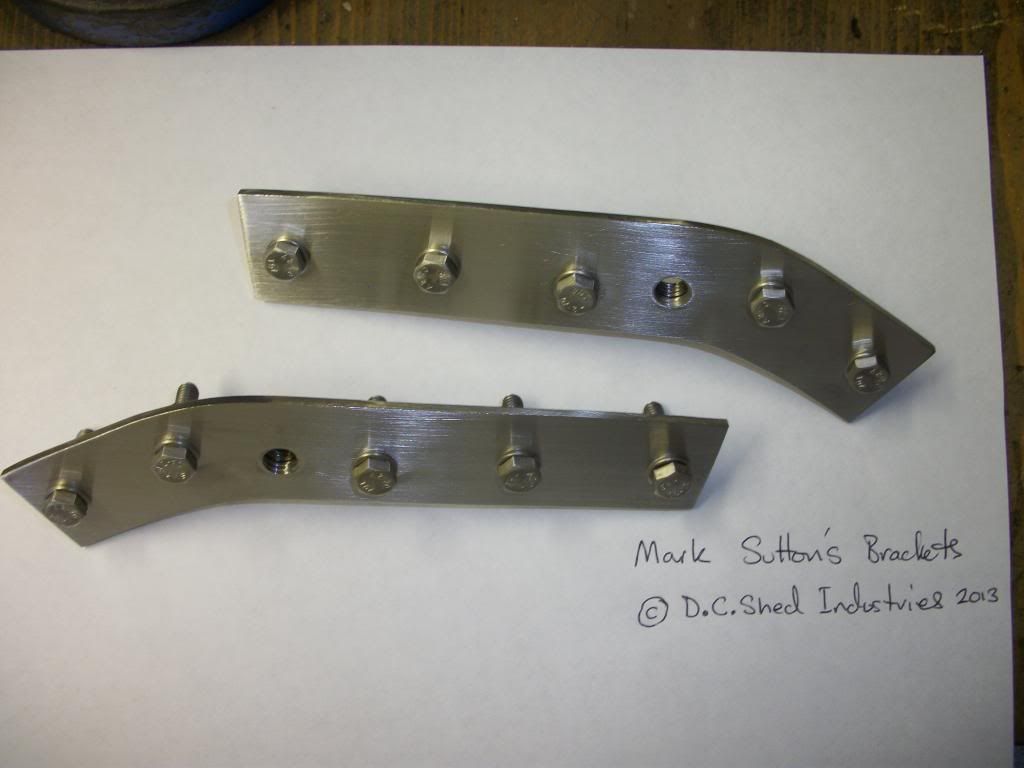
Just finished welding the "captive" Stainless nuts on the rear of the parts this morning.

Finished brackets below.

Pm me your address Mark and I'll post them out to you with fitting instructions tomorrow. Cheers :D

Image

Image
@classiccarguru1
Darren C
 
Posts: 1162
Joined: Wed Jul 22, 2009 8:55 pm
Location: In the garage, Emsworth. Hants
VIN #: 4532
Spaxed

Re: replacing/fixing door strut fixing brackets.

Postby flux3d » Sun Oct 13, 2013 1:23 pm

Will do mate. Thanks again, I owe you one. ;-)
Mark Sutton


New owner of VIN 10719
User avatar
flux3d
 
Posts: 312
Joined: Tue Aug 21, 2012 8:09 pm
VIN #: 10719

Re: replacing/fixing door strut fixing brackets.

Postby mec » Sun Oct 13, 2013 10:21 pm

Once again superb crafsmanship from Darren ! I wish you could work on my car for a few weekends it would be better than new !
NTH347X... now DMC 81X
Mike C aka MEC
vin - #4395


2009 DMC Europe open house Roadtrip member
Official 2010 Silvercoast "Chaved Banana"
Unofficial 2011 Eurofest Autotest WINNER ! 128.7 secs
2013 Silvercoast DMC Roadtrip Representitive
Eurofest 2016 Roadtrip member
2019 Hamburg Official Convoy Member

DeLorean Club
User avatar
mec
 
Posts: 2437
Joined: Sun Jun 07, 2009 12:11 pm
Location: romford essex
VIN #: 4395
Spaxed

Re: replacing/fixing door strut fixing brackets.

Postby andyd » Sun Oct 13, 2013 10:54 pm

Lovely Darren!

(and I haven't forgotten I still owe you a spring. I will get it in the post- promise!)

a x
andyd
 
Posts: 1185
Joined: Wed Jan 26, 2011 6:24 pm
Location: North London
VIN #: 814

Re: replacing/fixing door strut fixing brackets.

Postby flux3d » Sun Oct 13, 2013 11:16 pm

I know what you mean. These brackets are far better than anything else out there offered by the normal vendors, and thank goodness someone posted that video of the surface mounted brackets. Shocking amount of movement! I can't imagine how the guy felt after fitting those, only to see that!

Darren continues the great tradition of English back room, workshop engineering which outclasses the world.
Mark Sutton


New owner of VIN 10719
User avatar
flux3d
 
Posts: 312
Joined: Tue Aug 21, 2012 8:09 pm
VIN #: 10719

Re: replacing/fixing door strut fixing brackets.

Postby jerzybondov » Mon Oct 14, 2013 9:37 am

+1 Amazing work Darren! How many man hours is it to put together a set of brackets like that if you've got the right tools? Still quite a few I'd have thought?!
VIN 7176
Official Club Reaper Extraordinaire.
User avatar
jerzybondov
 
Posts: 2603
Joined: Sun Jun 07, 2009 10:24 pm
Location: London NW2
VIN #: 7176
Spaxed

Re: replacing/fixing door strut fixing brackets.

Postby Darren C » Mon Oct 14, 2013 2:37 pm

Cheers Guys,

I only use a hacksaw, file and drill. Oh and a mig welder. All BASIC tools, nothing more nothing less. Schoolboy stuff really. ;)

Gez, These took me about 6 hours on Saturday and 2 hours on Sunday to make. The hardest bit is hacksawing the shapes out from a large sheet of 3mm stainless plate by hand.

:ugeek:
@classiccarguru1
Darren C
 
Posts: 1162
Joined: Wed Jul 22, 2009 8:55 pm
Location: In the garage, Emsworth. Hants
VIN #: 4532
Spaxed

Re: replacing/fixing door strut fixing brackets.

Postby Dangermouse » Mon Oct 14, 2013 3:33 pm

BABIS wrote:
dmc4087 wrote:The Henninger brackets are bloody awful looking.

Hi guys

I want to share this video against these Henninger brackets https://picasaweb.google.com/1105335024 ... 8227393922

I think Dmc.eu brackets are simpler and better.. unless you have serious damages in the fiberglass area...

Best wishes


Is this link dead?

EDIT - nvm - just needed to use Firefox instead of IE :roll:
Dermot
vin 2743
Ex-Dunmurry-ite,
but now nr. Atlanta GA
US o'A

Vin 2743 – Black, Auto, non-lowered, non-Spaxed, non-carbed, non-turbo’d, non-de-catted, just as Neal drove it on the boat in August ‘81
User avatar
Dangermouse
 
Posts: 1401
Joined: Tue Jun 09, 2009 1:32 pm
Location: Johns Creek, Georgia
VIN #: 2743

Re: replacing/fixing door strut fixing brackets.

Postby ALEXAKOS » Mon Oct 14, 2013 7:03 pm

Dang man! Hyphestus him self!


Sent from a mobile device. Please excuse typos etc
VIN 5992/Body 5697/Frame 6000/Grey/Manual/LEDs/HALOs/SPAX/DMOCO SS shifter/MOMO/Custom SS exhaust/K&N/SS: f.fascia mounts,brake+clutch lines+tank cover+heat shlds/Posi-quiet brake pds/Poly bushing: steering +f.sway bar +radius.
User avatar
ALEXAKOS
 
Posts: 1300
Joined: Fri Aug 09, 2013 7:03 am
Location: +37°07424'N +23°80951'E
VIN #: MMMMMCMXCII
Spaxed

Re: replacing/fixing door strut fixing brackets.

Postby Darren C » Mon Oct 14, 2013 8:53 pm

You guys crack me up….Alex, you ain’t seen nothing yet. I love the God who made armour reference!

Really, its simple basic engineering that anyone can do in their garden shed with just a few basic tools.
I love working with Stainless Steel it’s a great material and so versatile. Here’s a few other D.C. Shed Industries recent Stainless Creations…..
Apologies for going off topic and hijacking the thread Mark, but hopefully it will inspire you guy’s to have a go yourselves.

Here’s a week in the life of my Shed Industries. (This is in my spare time, I do have a day job)

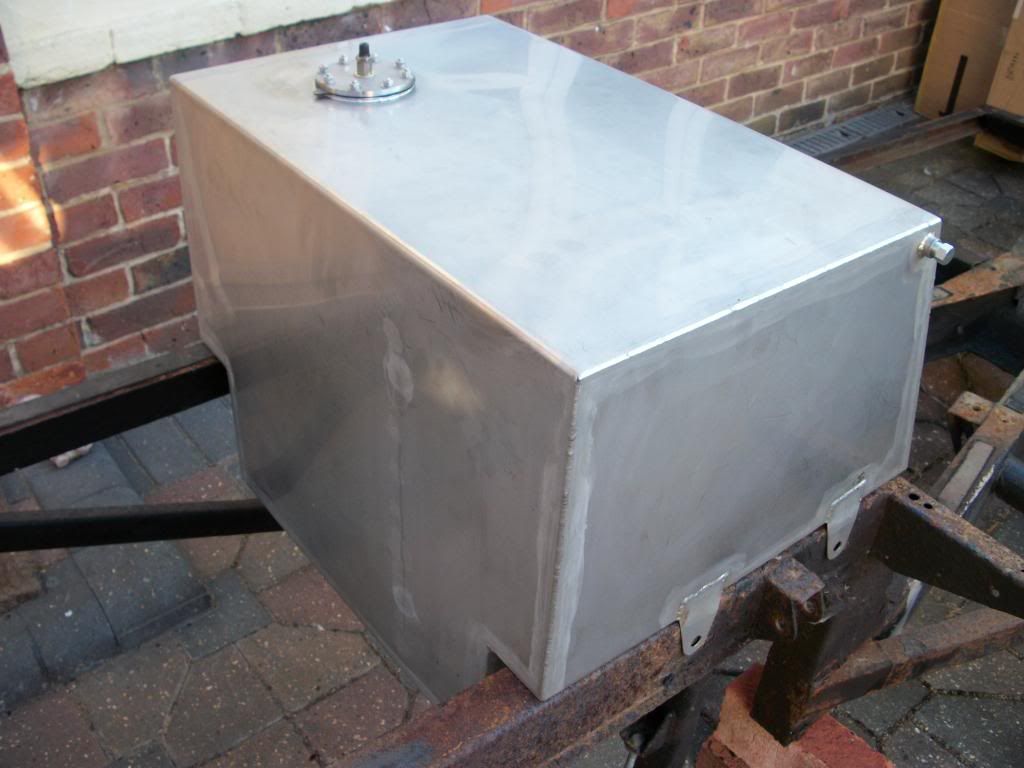
Fuel Tank

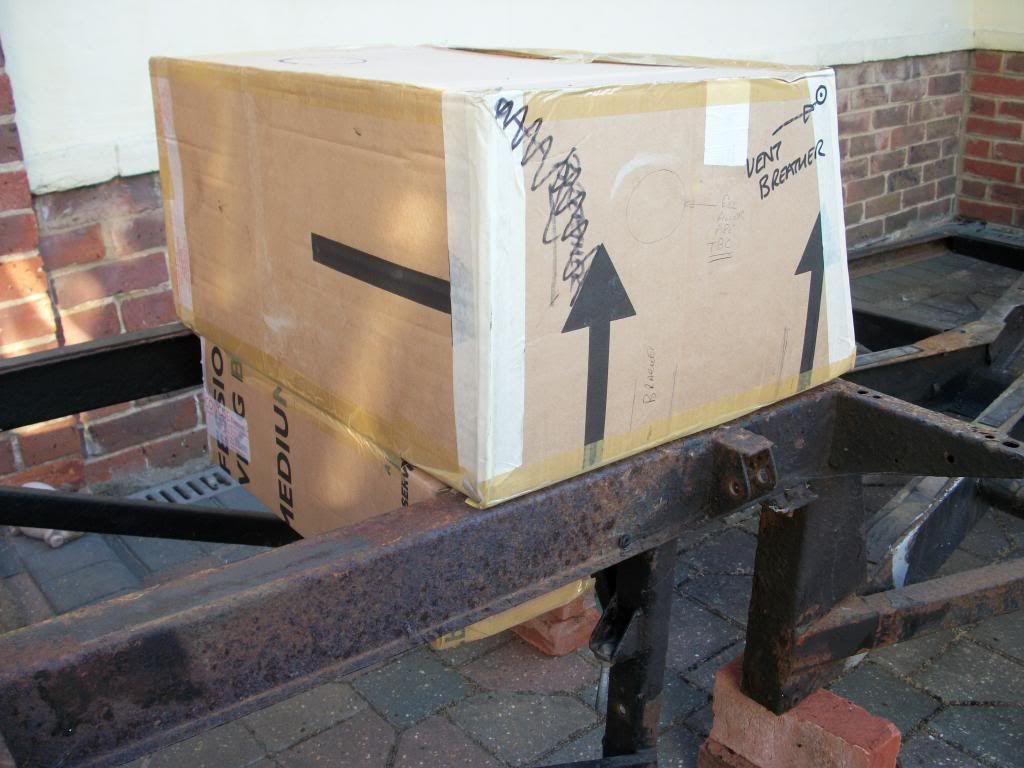
Some of you are aware I’m building a DMC car, some may not. It’s a “Darren Motor Company” Shed Industries Special. So far I have made my own chassis and a few weeks ago I made a Stainless Fuel Tank. Because its going to be a 4 seater that I want to handle like a mid engined sportscar I have placed the engine behind the front wheels and the fuel tank is going on top of the rear axle to give minimum overhang weight to the front & rear.
After designing it in my head I made a cardboard template.(ignore the frame its sitting on that for something else.
Image

Then I cut it out of stainless sheet, machined the fuel sensor boss, and fuel vent, supply and return fittings on my lathe. Designed an internal baffle and cut it out. Finally Tig welded it all together, fitted an alloy wheel tyre bolt in valve and pumped it up to 20 PSI to test for leaks and left it 48hrs. All good to go.
Image
@classiccarguru1
Darren C
 
Posts: 1162
Joined: Wed Jul 22, 2009 8:55 pm
Location: In the garage, Emsworth. Hants
VIN #: 4532
Spaxed

PreviousNext

Return to Welcome! ... General DeLorean chat

Who is online

Users browsing this forum: No registered users and 4 guests

About us

The DeLorean Club UK forum for European DeLorean owners and enthusiasts. The largest DeLorean forum in Europe.

Registration is FREE and all registered users get full access